You need the right tools for the right job! Sounds like something a handyman might say but it’s true! Curious about my go-to supplies for graphic recording and graphic facilitation? Keep reading. These are a MUST for each event, meeting or conference we attend. They are full of our favorites along with some other tools of the trade. In today’s post, I am sharing all about what is in my kit! Check out the photos below as well to get a better picture.
My Toolbox
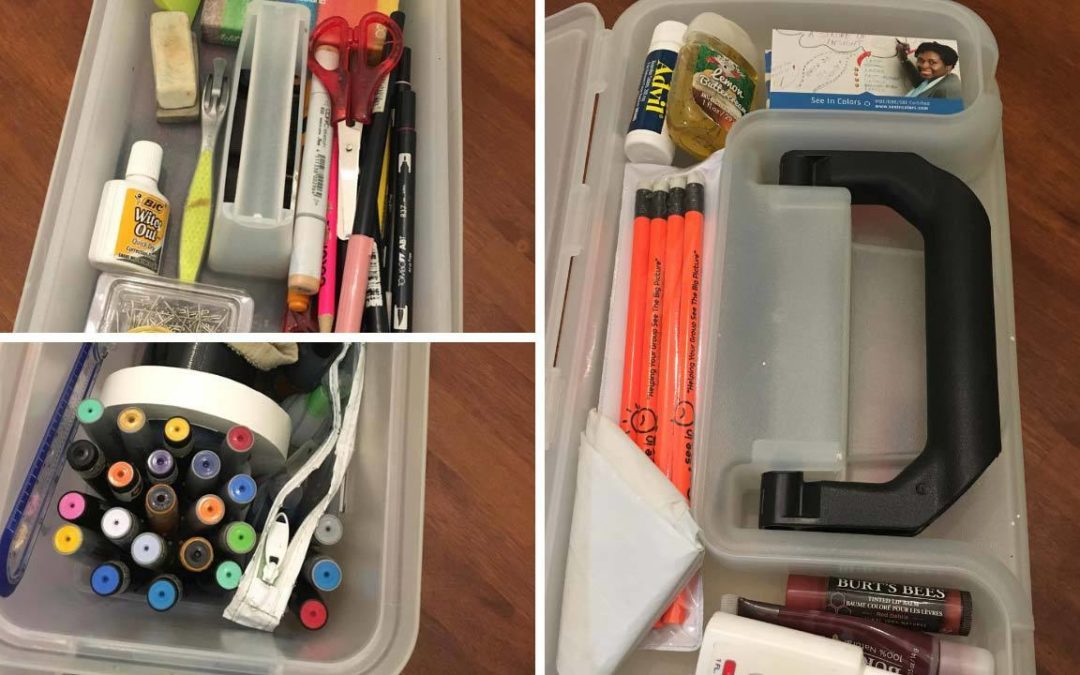
My ArtBin Sidekick supply box holds everything I need with a little bit of room to grow as well! This product is perfect for when I have to travel and compact enough to take with me anywhere. It fits so well in my carry on next to my clothing and personal items. It stays locked shut, so I don’t have to worry about any ink spills happening in my suitcase. It’s super durable and effortless to clean. This product has three different sections for storage, and I have each spot filled with items.
Section One – Personal Items
This part of my ArtBin storage box has miscellaneous personal items that are great to have on hand during any job. I have hand sanitizer, lotion, business cards, and See in Colors pencils to hand out to clients and connections that I make at events. I always make sure to keep a plastic bag handy in case there is not a trash can close by, or I need to clean up some items in my workspace during an event.
Section Two – Work Supplies
In the final two parts hold the majority of the items I use during my graphic recording process! In this particular section, I have chalk, a pencil sharpener, erasers and some markers included. I always make sure to have child-proof scissors in there because they are TSA-friendly for when I travel! Whiteout is also an item I double check for when packing because it is so useful whenever I have a small error to fix or something to cover up on a drawing.
Section Three – Work Supplies (part 2)
This division holds my Neuland marker collection along with some refill ink. Artist tape and duck tape can always be found in this spot too! Duck tape is a universal go-to tool to keep in your kit. I like to keep some on hand at all times.
Want to learn how you can draw ideas with visual notes? Sign up on our interest list for the Learning Lab. Be the first to know about online courses, coaching and public workshops.
Bullet journaling has become a huge source of creativity and productivity for creatives across the world. Originally created by Ryder Carroll, this style of record keeping can be as simple or as complex as you need it to be.
In this day and age, it can be hard to keep track of everything in one place. Even with technology, it can be hard to get everything down. Pen and paper can be the way to go. A bullet journal provides a way for you to be organized in a creative way. From tracking your water intake, keeping up with tasks to dreaming big with a bucket list, your bullet journal can hold as much information as you like.
Bullet journals can be a gamechanger in the workplace. Take a break from your technology and use your bullet journal to plan strategically, organize your thoughts and keep track of your calendar. Bullet journals can provide a full visual and creative freedom that computer screens would limit. This style of note taking can also liven up meetings as well. Repetitive operational meetings can get boring, but by adding notes to your bullet journal it can boosts creativity during those long days in the boardroom.
Getting started with your bullet journal:
Find your journal – Decide if you want lined or blank paper, dotted versus gridded, etc. You can get a large journal or start smaller. The key to bullet journaling is customizing it to your needs.
Figure out your topics – What do you want to include in your bullet journal? Consider creating a brain dump page before you get started. *Important note – make sure to skip a few pages at the beginning of your journal to leave room for your index.
Create your index – Consider your index your “table of contents” for your bullet journal. This will serve as your guide for finding specific information in the future. This portion will be extremely helpful once your bullet journal becomes full of your notes. Also, make sure to number your pages to keep with completing your index.
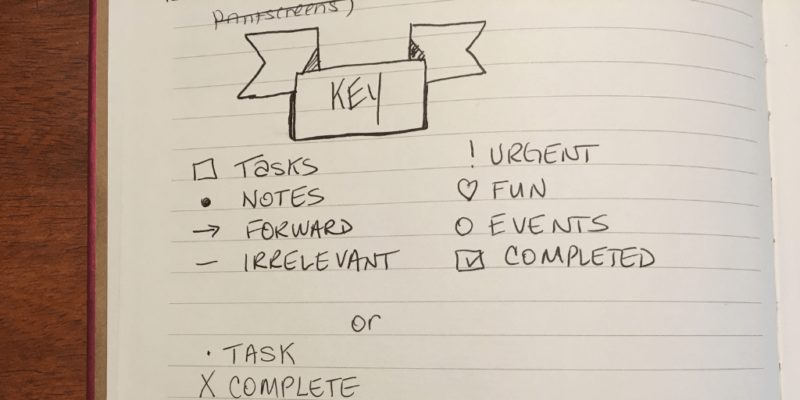
Design your key – Your key will have various indicators for your task lists. A simple dash “-” can serve as a general indicator of a task, while other symbols should be designed for different categories for your tasks. Design markings for tasks once you have completed them, moved to a different date or canceled altogether. This can evolve over time, but having a general guide is helpful.
Make it your own – Having an initial setup of pages and topics is great to get you started, but the main purpose of bullet journaling is making it your own. Search online for inspiration. Get ideas for layouts, content and more. Be sure to add some fun icons to your bullet journal with our visual note taking sheet!
Need some more inspiration? See photos of my journal below. Can’t wait to see what you create!
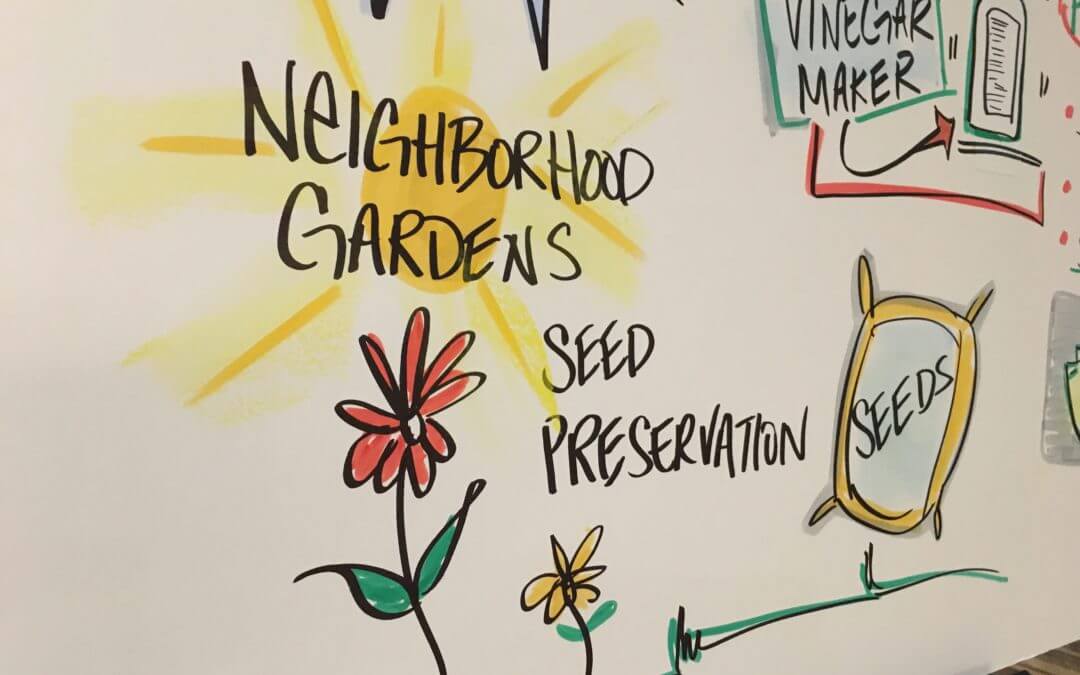
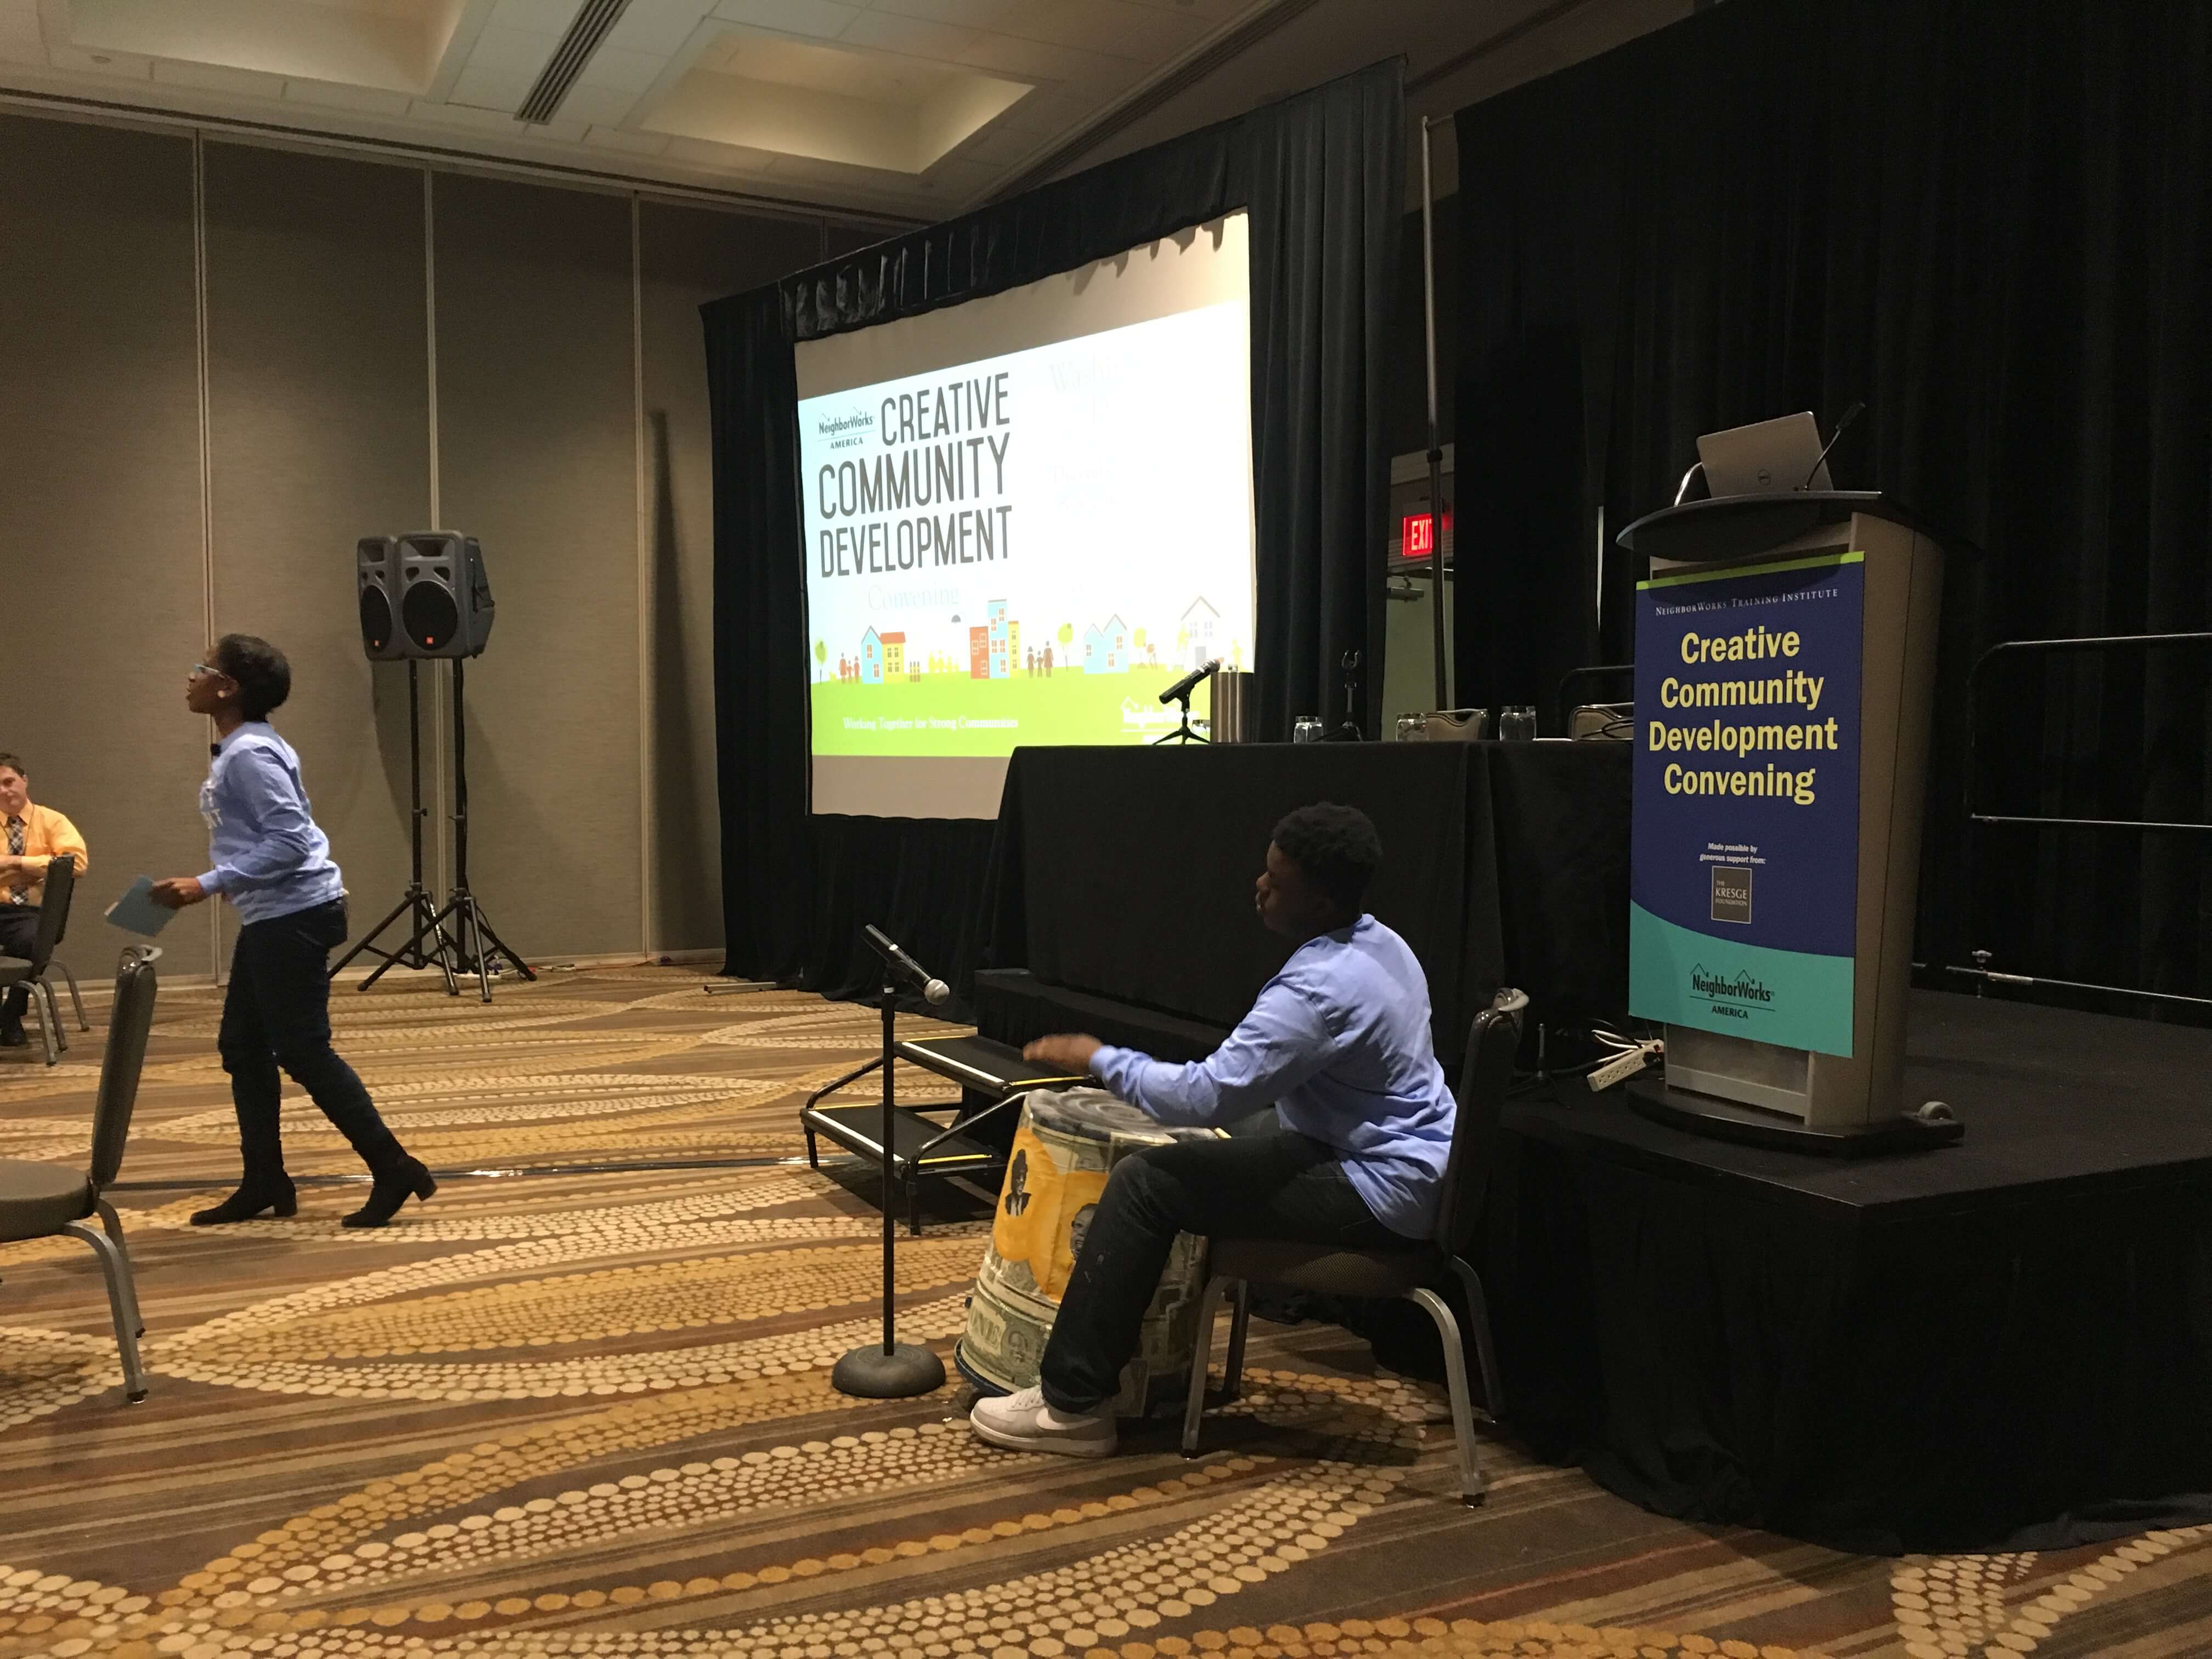
It’s exciting to see art, culture and community development come together. That’s exactly what happened at NeighborWorks America #DCNTI. The agenda was interactive and creative. See In Colors supported the conference by drawing visual notes real time (graphic recording) for attendees. This convening was held on December 14, 2017 at the Renaissance Downtown Hotel in Washington, DC.
Click on the image below to watch the quick video of visual notes.
Creative Introduction with Holly Bass and local artist playing the drums.
Panel discussion on funding sources
Our closing for the day was a community poem created by all participants. As the poem was read aloud, I listened and captured some of the highlights in this graphic recording. I loved seeing the creativity throughout the day, because “out of the box” thinking is how we move toward new ideas and solutions.
Thanks for reading! If you find this valuable, please share. We love referrals.
Are you planning a meeting or conference? Keep your attendees engaged, they need to SEE the big picture. Just contact me for a free consultation. I’m happy to help.
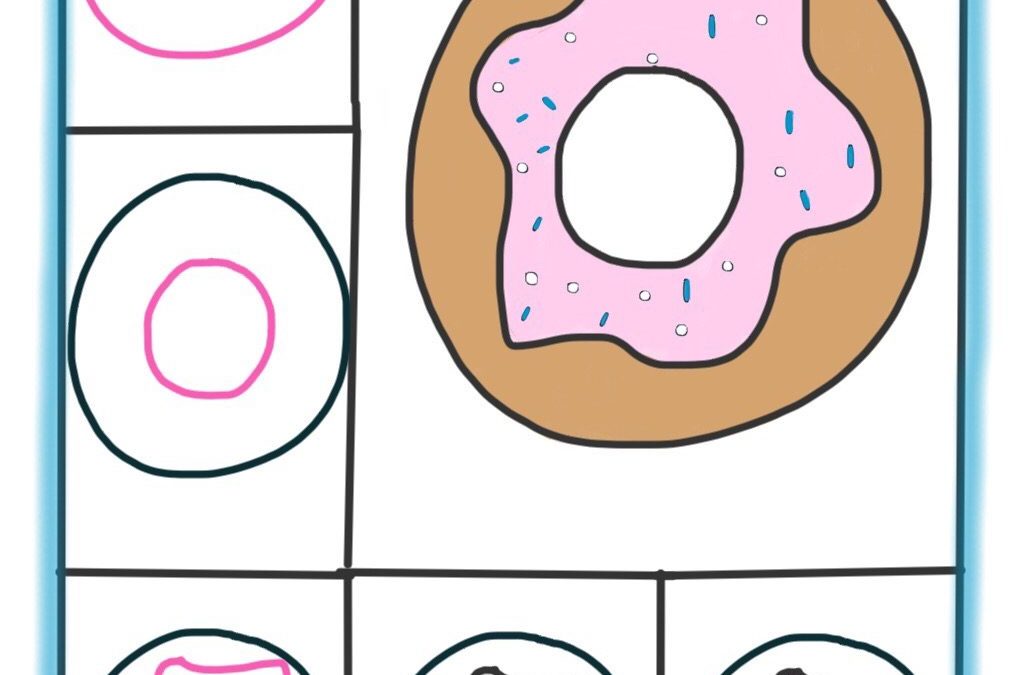
Many years ago (1984 to be exact) there was a commercial for Dunkin Donuts with a famous line that went “Time to make the doughnuts!“. Well, you don’t have to get up early and work at Dunkin Donuts to make one! In this quick lesson I’ll show you how to build your visual vocabulary and draw a doughnut in 5 easy steps.
Let me show you how you can use this image at work, school, or home.
Use a doughnut when you are drawing visual notes. A doughnut image can represent a “reward, treat, dessert, calories, or indulgence“.
Do you have a meeting, training session, or workshop where you will have breaks in the agenda. Draw your agenda on a flip chart or whiteboard. Then draw a doughnut next to each break in the agenda to represent a break for sweets.
Celebrating an accomplishment for your team, students, or a family member? Write the word Congratulations on a whiteboard or flipchart and draw a large doughnut next to it.
I will leave it up to you, where to buy your donuts! Personally, I’m a Krispy Kreme fan (smile).
Can you think of more ideas that a doughnut can represent? I’d love to hear it.
Thanks for reading! If you want to use visual thinking for your next project, conference, or strategy session, just contact me for ideas.
April 4th is National School Librarian Day. Let’s give librarians a round of applause and celebrate them with visual thinking.
When you think of a librarian, what image comes to mind. Books pop into my mind.
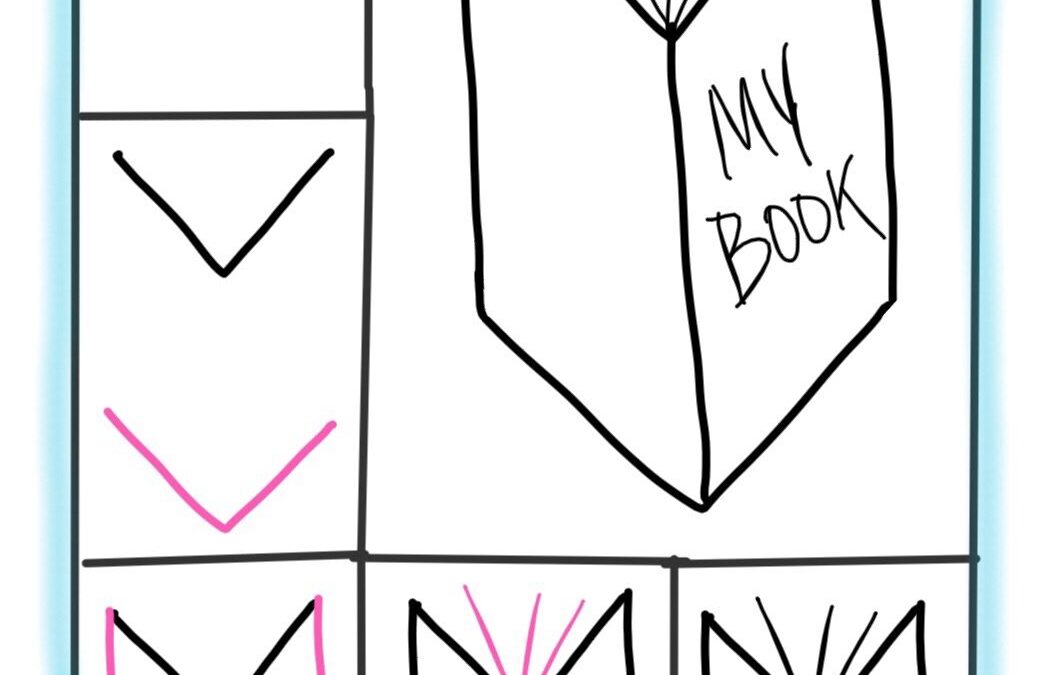
Here is a quick lesson on how to draw a book in 5 easy steps. Give it a shot.
Icons like this can help build your visual vocabulary. Of course you can use this icon to draw tons of concepts. For example a book can represent learning, school, teacher, research, and so much more. And several books together can make a library!
Can you think of more ideas a book icon can represent? I’d love to hear it.
Thanks for reading! If you want to use visual thinking for your next project, conference, or strategy session, just contact me for ideas.
Graphic recording is a skill used to capture and summarize meeting content by using hand drawn pictures and text. Using the visuals of graphic recording helps with retention, decision-making...
Sign up for a weekly dose of visual ideas, inspiration and creativity + receive your Visual Note-Taking Tip Sheet. Just enter your email address below...